Thursday, October 12th 2023

From time to time you find tools that make your life easier. But often we don't share or give credit to those tools. Today, I thought I would share a tool I've been using over the last year or so. This tool allows you to record your screen and produce GIFs. I've found a number of great uses for this tool. My first encounter was while doing troubleshooting for a software bug. While working as a manager of a software development team a support technician reported an issue with our software. Our developers could not reproduce the problem. The classic "it works on my machine" type scenario. Unfortunately we didn't have time setup a meeting for the technical support staff to demonstrate the bug. I got thinking, a picture is a thousand words. But a video much more. So I went looking for a simple way for them to record their screen. That's when I came across Screen To GIF.
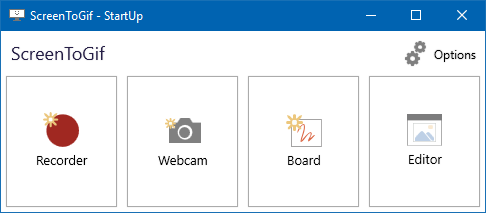
Screen To GIF is a Windows application that can be installed or ran as a portable app. It's very simple to use. Just launch the software and you're presented with a simple record button. Click record and another window will open that behaves similar to a view finder on a camera. Whatever's in the window will be captured in the final GIF. Once you're done recording you're presented with a video editor. You can crop and edit to your hearts content. Then export the video as a GIF.
In my use case it worked perfectly. They were able to capture the bug. I shared it with the team and we solved the problem. Even as well as they described the behavior, they left out important details. Having a video captured the missing details. One thing to note is that GIFs can get rather large the longer they go. If what you're capturing is longer than 30 seconds, I would suggest using a video capturing application. But we'll save that for another post. Till then happy clip'n.
https://www.screentogif.com/
Categories: Tools
Friday, September 29th 2023
 Introduction
Every now and then, you find yourself doing a repetitive task. After about the third or four time, you're like "I can automate this." I find myself doing this all the time. Sometimes I can find ways to automate, sometimes I'm just out of luck. But this time I was able to. So I thought I would share this script I wrote and have found useful. Let me try to explain what it does.
The Problem
I write another blog about tv and movie cars. Every so often, I do post about upcoming streaming offerings of movies and tv shows that feature cars. I like to feature the posters of the movies in the post as a panel. Or at least that's the only terminology I can think of to describe it. You can see an example of this above. If you can think of a better name or know the proper name. Let me know! For years, I would throw the posters into MS-Paint. I would find the smallest poster by height and then add them all manually. For a three or four poster panel this would take me a few minutes. I finally said, enough is enough. Let's automate this. But how?
The Solution
For the last year or so, I have been studying Python. Just so happen to stumble across a Python library called Pillow. This library is just for working with images. It can do all kinds of stuff! So after thinking through the steps I would have done in MS-Paint, I was able to recreate that process in a Python script. Feel free to checkout the result below and copy or use it for your own use. As always, no warranties and we assume no reasonability for damages.
# Name: paneler
# Description: Merges all of the images in the 'files' directory into a single inline panel image.

import os
from PIL import Image

dir = "files"

files = os.listdir(dir)

smallestHeight = None

# load images into an list
images = []

for idx, file in enumerate(files):
    images.append(Image.open(f"{dir}/{file}"))

    # track the smallest height
    if smallestHeight == None or images[idx].height < smallestHeight:
        smallestHeight = images[idx].height

newWidth = 0
newHeight = smallestHeight

# resize all other images to match smallest height
for idx, image in enumerate(images):
    if image.width != smallestHeight:
        image.thumbnail(size=(images[idx].width, smallestHeight), resample=Image.Resampling.LANCZOS)
        newWidth += images[idx].width

# build a new image
newImage = Image.new(mode="RGB", size=(newWidth, newHeight), color=(0,0,255))

left = 0

# add images to new image, increase left by current width
for idx, image in enumerate(images):
    newImage.paste(image, (left, 0))
    left += image.width

newImage.save(f"{dir}/newimage.jpg")
Categories: Development, Programming, Tools
Tags: python
Sunday, January 17th 2021
 Introduction
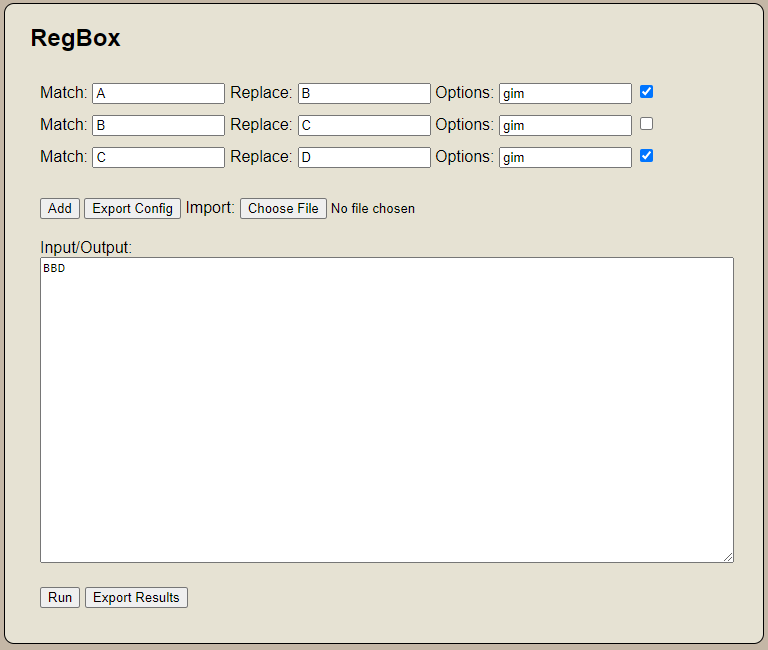
I've been using regular expression a lot lately. I like to use it to generate code. I generally use Notepad++ for this operation. However I've found situations where I repeat the same set of operations. I constantly have to re-enter or dropdown to the previous expression. Often forgetting which order the operations need to be ran in. I figured there has to be a better way. So I wrote a quick web app to help with this. I present to you RegBox. A simple tool for chaining regex find and replace operations. Not only will it chain these operations, but it will allow you to export and import operation chains. This app supports JavaScript regular expression flavor.
How To Use It
Cut and paste the text you want to perform regular expression find and replace on in the "Input/Output" box.
Enter the "Match" and "Replace" criteria.
Set which options you may need (gim - g for global, i for case insensitive, m for multiline by default).
Click "Run" to execute and text will change.
Additional Notes
You can add additional operations by clicking the "Add" button. If you need to disable an operation uncheck the checkbox at the end of the operation line. If multiple operations exist the script will run each operation based on the results of the previous operation (chaining). If you wish to run these operations again in the future, you can export a configuration file containing your operation configuration. Just use the "Export Config" button. You can reimport them later. Need the results of your scripts in a file? Just use the "Export Results" button to save to a text file.
Final Thoughts
This tool is provided as is. No warranty. Use at your own risk. I just built this to solve a problem I have. This may not work for you. But I'm happy to share it with you.
Tool
Categories: Development, Programming, Tools
Tags: development, javascript, regular-expression
Monday, March 2nd 2020
PHP MySQLDump Browser allows users/system admins to browse through MySQL Database Backups (Dump Files).
Users can view and extract individual table structures and or data from MySQL database dumps.
Use this script to avoid restoring entire backups to recover individual tables.
Database dumps complied by mysqldump and phpMyAdmin are compatible with this tool.
Note: This is an unoffical tool released under the GNU General Public License.
PHP MySQLDump Browser creators have no affiliation with Sun Microsystems.
INSTRUCTIONS:
- Place the script on your webserver or webhost in the same directory as your MySQL backup dumps.
- Run the script.
- Choose which backup file you want to search. The script will search through the
dump file for table structures and data. Depending on the size of the dump, this may take some time.
- Once the script has finished indexing the dump file, you may choose which table you wish to extract or
view. By default the results of your query will display in the iframe at the bottom of the page. However
you may download the results to file by clicking the download link above the iframe.
IMPORTANT: Remove PHP MySQLDump Browser as soon as you are finished.
COPYRIGHT AND DISCLAIMER:
THIS SCRIPT IS PROVIDED AS IS, WITHOUT ANY WARRANTY OR GUARANTEE OF ANY KIND
This program is free software; you can redistribute it and/or modify it under the terms of the GNU General
Public License as published by the Free Software Foundation; either version 3 of the License, or (at your option)
any later version. If you change this script or add any features please tell me.
Download
Categories: Development, Programming, Tools
Tags: development, php, programming

 Introduction
 Introduction