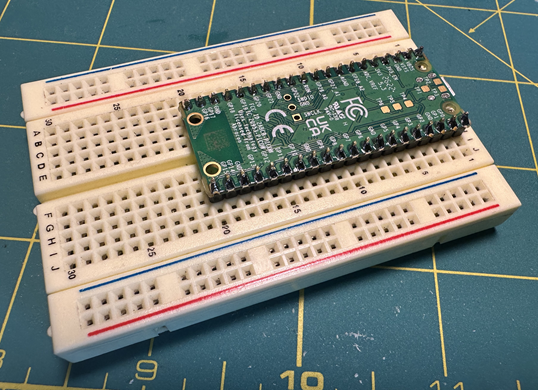
Sometimes you just have to try something new. A while back I was working on a project using the Raspberry Pi Pico. I noticed that the Pico has a nice silk screen pinout listing on the back. When installing headers normally (boot button up), this gets covered up. Why not flip the Pico over and make it easy to read? So I did just that. Above you can see my example. The only disadvantage is that the boot button is now on the underside. But generally this button should not be needed that often. Hope this may have inspired you in your projects. Enjoy!
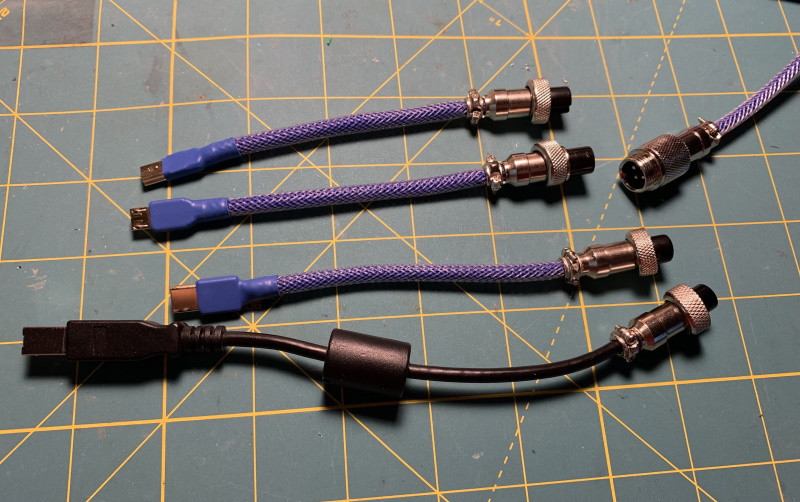
I recently purchased a special USB cable from Amazon. This cable has a standard USB Type A connector on one end (PC side). On the other end is a GX12-4 Aviator connector. Included with the cable are several little "pigtails" for different USB connectors (USB Type C, Micro Type A and Mini Type A). This allows you to switch out the end without having to reach around to the back of your computer and unplug and plug in a different cable. I find this really convenient for working with different Arduinos and other development boards. It looked like all of my needs were met, until I pulled out my original Arduino Uno (uses a Type B). So I decided to make my own "pigtail."
I purchased some GX12-4 aviator panel mount connector pairs. I went with the panel mount version, because they're much cheaper than a complete weather tight connector pair like featured on the cable itself. Since we only need the male end of the connector this is perfect. I grabbed a spare USB Type B cable, I had laying around. I hacked off one end. I found a pinout online and verified the wire colors. I then toned out the pinout of the new cable. I made some notes. Soldered everything together. Plugged it in and... nothing worked! Turns out I had everything backwards. Luckily no damage to my computer's USB port. After reversing everything it worked like a charm. I made sure to program a board over the new pigtail to be sure. So there you have it my latest mini-maker project. I hope this inspires or helps you. See you next time!
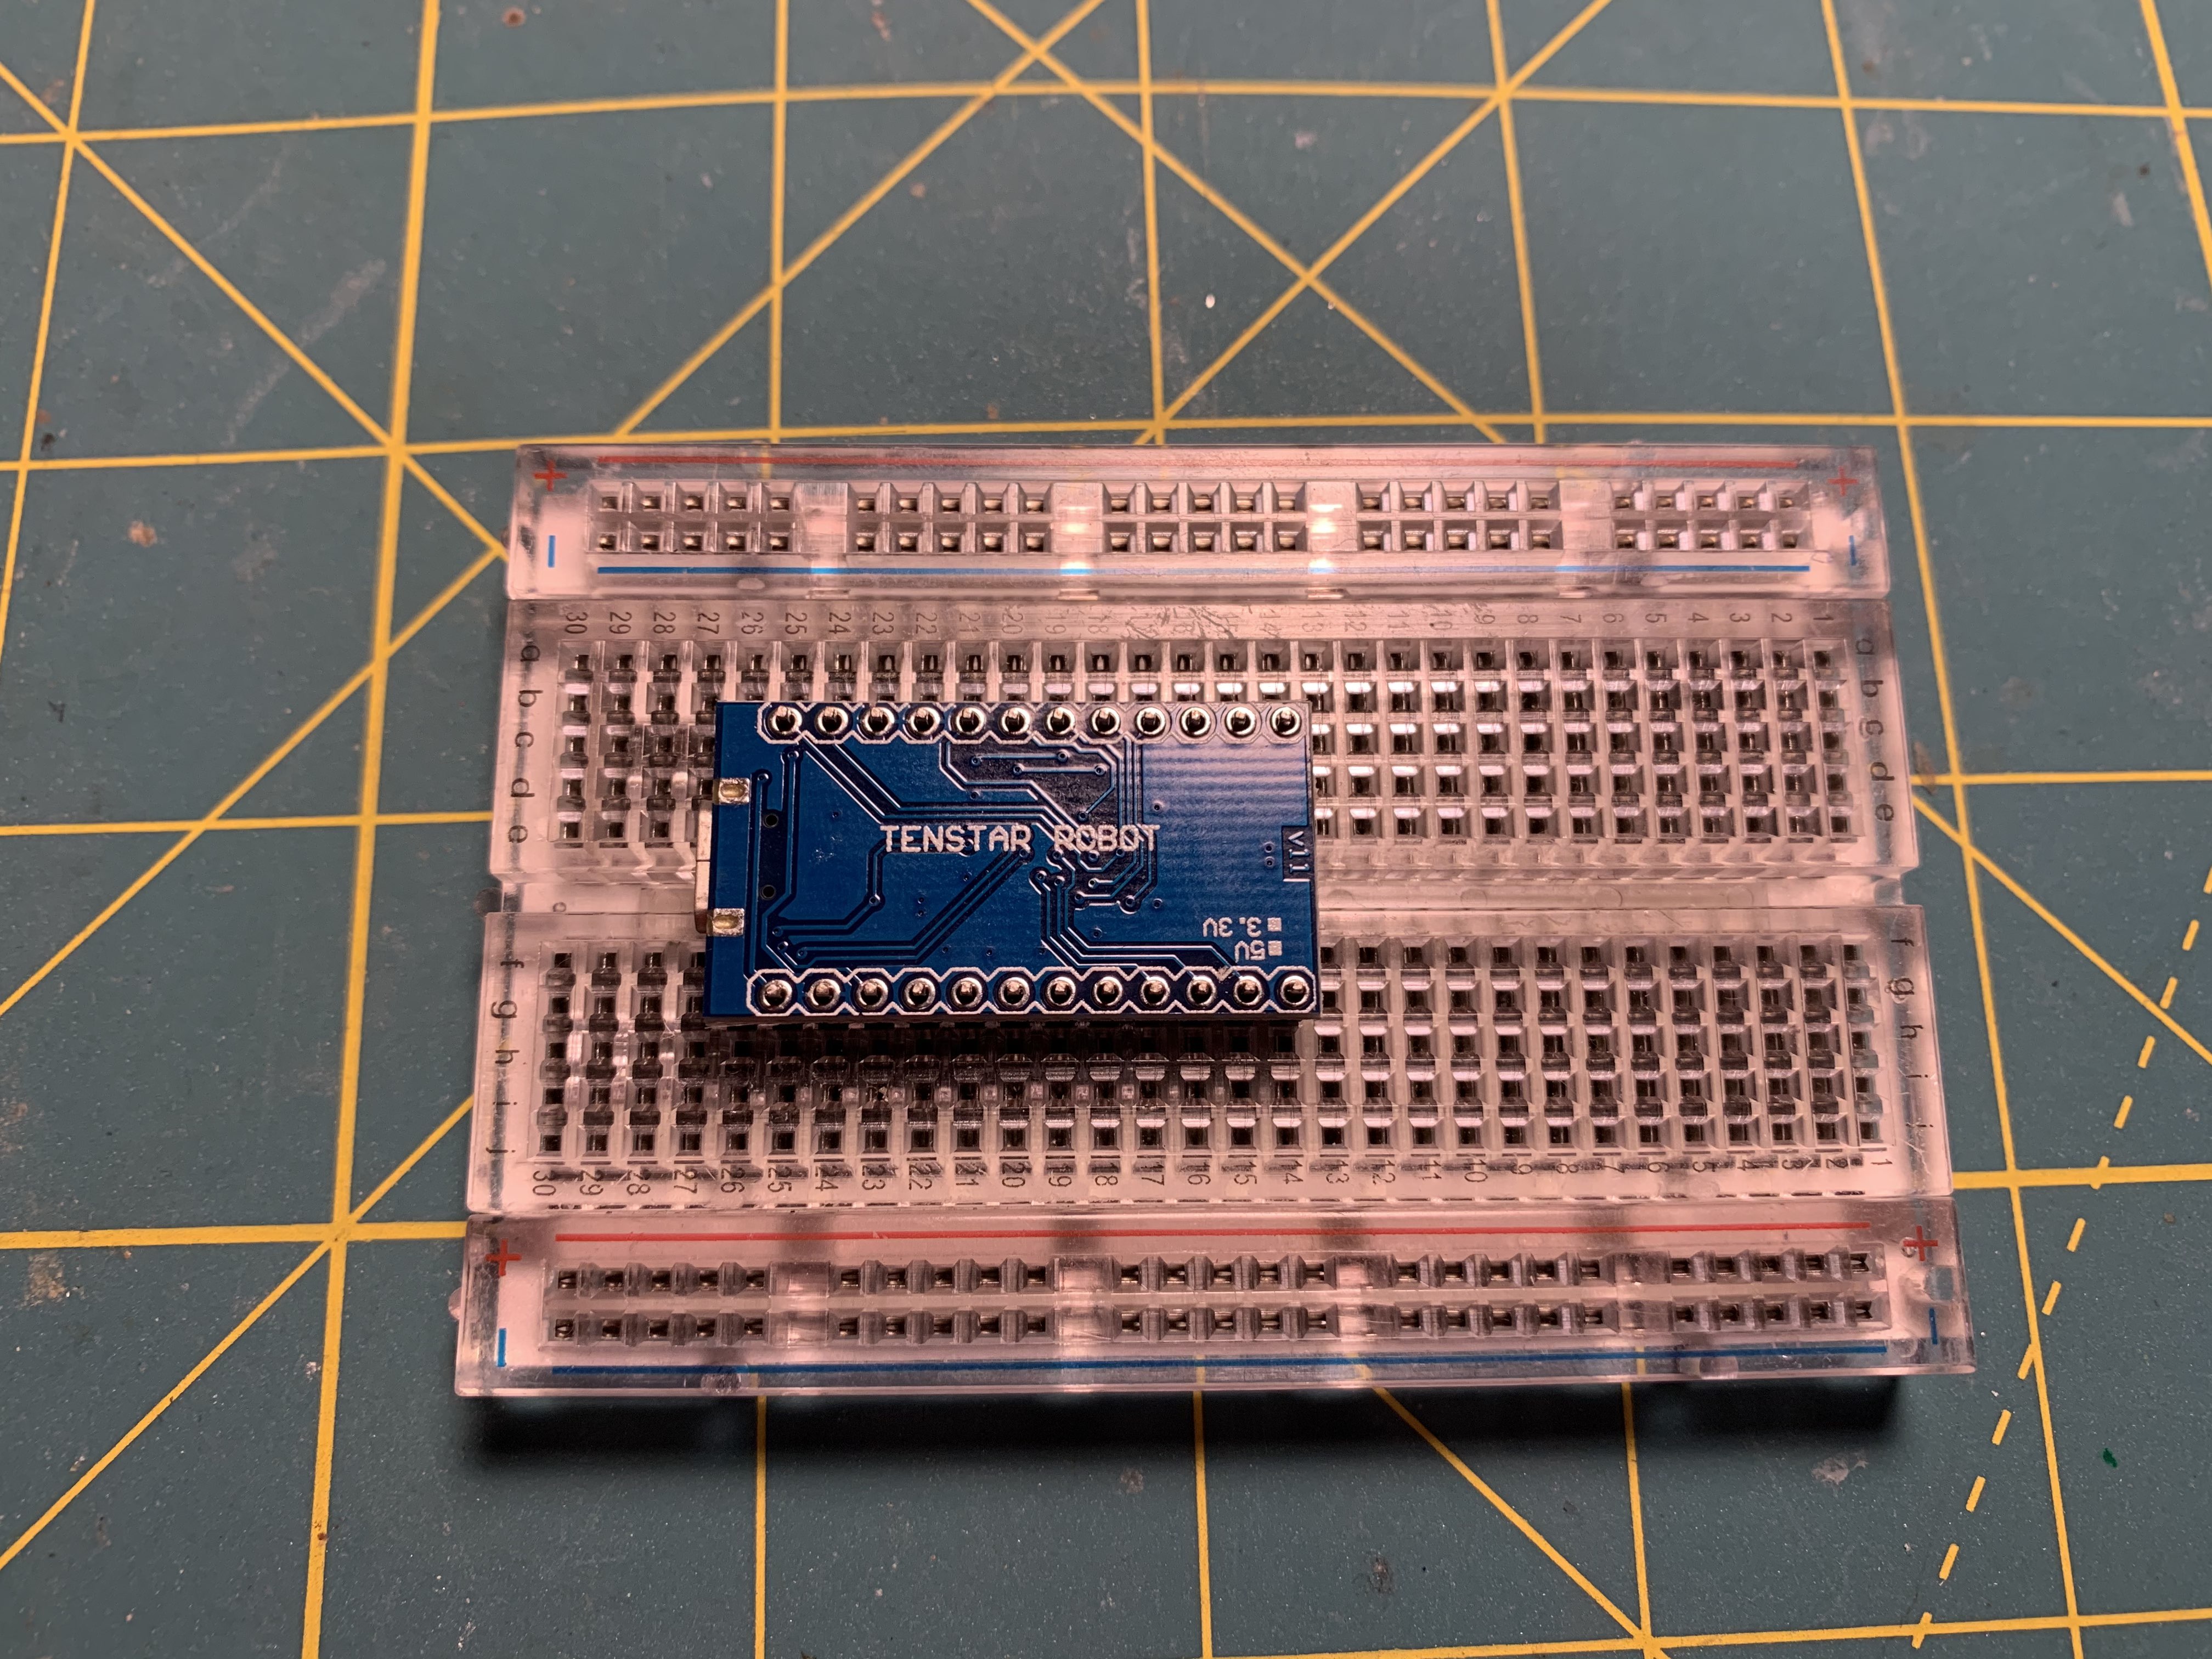
Soldering header pins on a development boards can be a pain. But it doesn't have to be. Here's a little trick I wish someone had shown me earlier. Simply place the headers on a empty breadboard. Then put your development board on the pins. Carefully solder the first and last end of the pin of the header. If you're using an older breadboard you're not concerned with messing up, go ahead and solder the rest of the pins. If not, remove the the board and finish soldering the header on away from the breadboard. This is so much easier than other methods I've tried to used in the past. I hope this makes your soldering experience a little better. Enjoy!
Been working on some more surface mount soldering practice. One of the reasons I'm focused on this right now is because my cousin has a project for me to work on that involves SMD work. I want to make sure my skills are up to par before going any further.
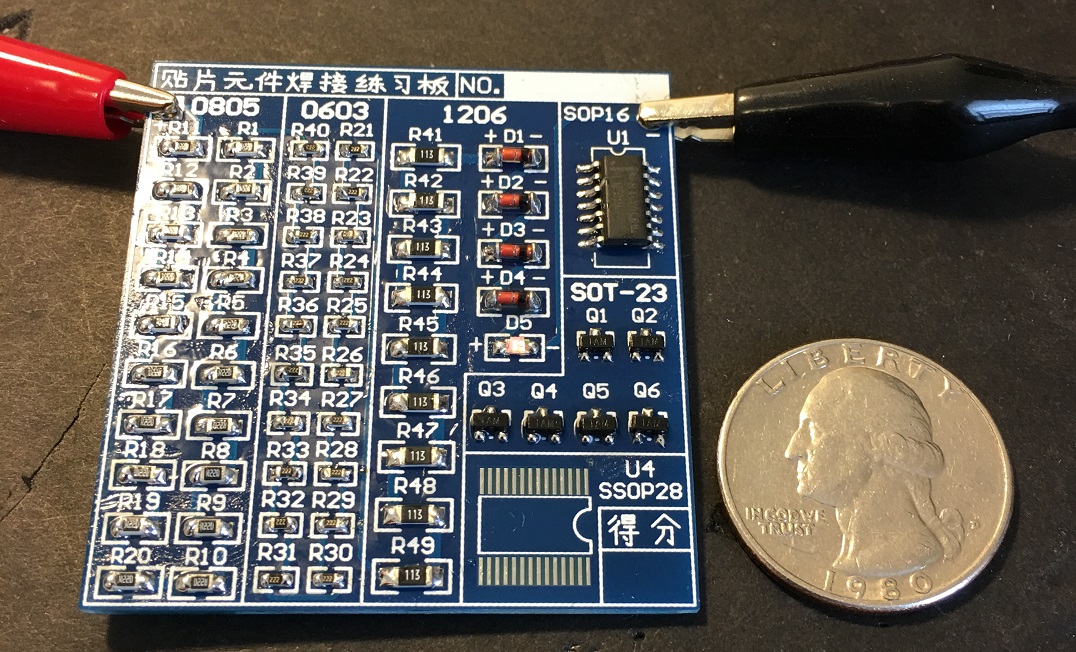
The completed kit above I got from eBay. It was less than dollar with shipping. Granted it took several weeks to arrive from China. But it was well worth it. I threw the quarter in there for scale. The kit has several sizes of resistors with different values. On the smaller units, I had to utilize a magnifying glass to do most of the work. I also was careful to use flux this time. I think that made a huge difference. Especially when it came to drag-soldering the IC. Speaking of. The IC is a LM339 comparator chip. But honestly I can't tell you exactly how it's used in this circuit.
Matter of fact, there isn't a whole lot of documentation with this kit. It's possible that the kit is mainly testing for polarity. If you get a lit LED after hooking 7-15 volts DC to it you're good. Kinda like a pass/fail test. Either you get a gold star or not. However it is a really good practice kit for the money. I've got some more kits lined up from Flyandance. Hopefully I will get around to doing those kits as well. I'll be sure to put them up too. See ya next time!
I posted this video on Youtube a few weeks ago. I haven't had much of a chance to repost it on here. But if you're looking to get into surface mount soldering this is the kit for you. I'm a absolute newbie. Well let's just say I went through two kits to get it right. Enjoy!