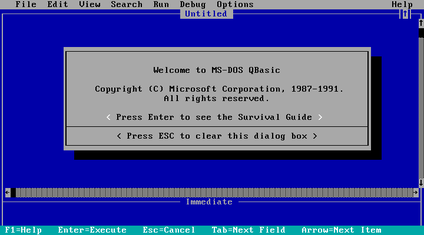
When I was a kid, I spent many hours trying to program stuff in QBasic. I was able to do a few basic things with graphics, drawing shapes, etc. Often I look back at these fond memories. But I can't help but think: "If I could teach my kid self one thing about programming what would would it be?" After much thought, I landed on a few things. But I think I would have made use of data files the most. I wanted to build programs to help my brother run his automotive shop or manage our Boy Scout's advancement records. So I thought, why not explore this concept more and see what was possible. So young Matt, here's the one lesson I pass on to you.
There are several ways to write data to files in QBasic. But I think the most useful mode for database like functions is the "RANDOM". With this mode you can retrieve records by "record number".
TYPE Address
	id AS INTEGER
	status AS STRING * 1 'A = ACTIVE, D = DELETED
	contact_name AS STRING * 30
	address1 AS STRING * 30
	address2 AS STRING * 30
	city AS STRING * 30
	state AS STRING * 2
	zip AS STRING * 5
END TYPE

DECLARE SUB PrintAddress (record AS Address)
DECLARE SUB InputAddress (record AS Address)

CLS

dim path as string
path = "projects\address-book\ADDRESS.DAT"

DIM record AS Address
DIM prompt AS STRING * 1
prompt = "Y"

DO WHILE UCASE$(prompt) = "Y"
	PRINT "Adding New Record"

	CALL InputAddress(record)

	OPEN path FOR RANDOM AS #1 LEN = LEN(record)
		DIM count AS INTEGER
		count = LOF(1) / LEN(record)

		record.status = "A"
		record.ID = (count+1)

		PUT #1, (count+1), record

		PRINT "Record Added."
	CLOSE #1

	INPUT "Add Another Record? (Y/N)"; prompt
LOOP

END

SUB PrintAddress (record AS Address)
	PRINT "ID:       " + LTRIM$(STR$(record.id))
	PRINT "Contact:  " + record.contact_name
	PRINT "Address1: " + record.address1
	PRINT "Address2: " + record.address2
	PRINT "State:    " + record.state
	PRINT "City:     " + record.city
	PRINT "ZIP:      " + record.zip
	PRINT STRING$(25, "-") + " "
END SUB

SUB InputAddress (record AS Address)
	INPUT "Contact:  ", record.contact_name
	INPUT "Address1: ", record.address1
	INPUT "Address2: ", record.address2
	INPUT "City:     ", record.city
	INPUT "State:    ", record.state
	INPUT "ZIP:      ", record.zip
	PRINT STRING$(25, "-") + " "
END SUB
Happy Holidays everybody! Just a quick post to show off a Binary Clock I made using HTML/CSS/Javascript. This is similar to the clocks once sold by Think Geek. I always wanted one of my own, but could never justify the cost. But I figure why not try my hand at making one in software. Each LED is just a DIV element with a 100% round border with two CSS classes for each state (off/on). I wrote some code that runs every second to generate a time string. I convert the time string to binary and update the LEDs. Feel free to look at the code below the example. As always, code available at your own risk!
Clock
<!DOCTYPE html>
<html lang="en">
<head>
<meta charset="UTF-8">
<meta name="viewport" content="width=device-width, initial-scale=1.0">
<title>Binary Clock</title>
<style>
.title {
width: 100%;
font-size: 24pt;
font-family: 'Courier New', monospace;
font-weight: bold;;
}
.clock-body {
display: flex;
flex-direction: row;
width: 300px;
height: 150px;
border: solid 2px;
border-radius: 5px;
background-color: grey;
align-items: end;
text-align: center;
padding-bottom: 25px;
}
.clock-col {
width: 20%;
}
.clock-led {
border: solid 2px;
border-radius: 100%;
width: 25px;
height: 25px;
background-color: green;
margin: auto;
margin-top: 2px;
line-height: 1.5;
}
.clock-led-on {
background-color:chartreuse;
}
</style>
</head>
<body>
<div class="title">Binary Clock</div>
<div class="clock-body">
<!-- HOURS -->
<div class="clock-col">
<div class="clock-led"></div>
<div class="clock-led"></div>
</div>
<div class="clock-col">
<div class="clock-led"></div>
<div class="clock-led"></div>
<div class="clock-led"></div>
<div class="clock-led"></div>
</div>
<!-- MINUTES -->
<div class="clock-col">
<div class="clock-led"></div>
<div class="clock-led"></div>
<div class="clock-led"></div>
</div>
<div class="clock-col">
<div class="clock-led"></div>
<div class="clock-led"></div>
<div class="clock-led"></div>
<div class="clock-led"></div>
</div>
<!-- SECONDS -->
<div class="clock-col">
<div class="clock-led"></div>
<div class="clock-led"></div>
<div class="clock-led"></div>
</div>
<div class="clock-col">
<div class="clock-led"></div>
<div class="clock-led"></div>
<div class="clock-led"></div>
<div class="clock-led"></div>
</div>
</div>
</body>
</html>
<script type="text/javascript">
// first digit of the hour only needs 1,2, second digit 1,2,4,8, ex..
const digitLengths = [2, 4, 3, 4, 3, 4];
window.setInterval(() => {
// get current time from time string ex. 23:59:59 => 235959
const strTime = new Date().toTimeString().substring(0,8).replace(new RegExp(":","g"),"");
// loop over each time digit
strTime.split("").forEach((c,ci) => {
// convert strTime to binary for the digit length
const binary = Number(c).toString(2).padStart(digitLengths[ci],"0");
// loop over binary digits
binary.split("").forEach((l,li) => {
// find the column and the led by indexs
const led = document.querySelector(`.clock-col:nth-child(${ci + 1}) .clock-led:nth-child(${li + 1})`);
// toggle the LED off
led.classList.remove("clock-led-on");
// add class on if set
if(l == 1) led.classList.add("clock-led-on");
});
});
},1000);
</script>
I've been playing around with Tkinter this week. What is Tkinter? Tkinter allows you to build GUI based applications in Python. It's not the only GUI library for Python, but it is included when you install Python. So pretty much any install of Python is going to include Tkinter. I just repeated myself didn't I? Oh well. So why build GUI based applications. Well for ease of use. Most end-users today, would laugh if you gave them a console application. Despite the fact console applications can often be more efficient than GUI based ones. But at the end of the day, GUI applications just look and feel better.
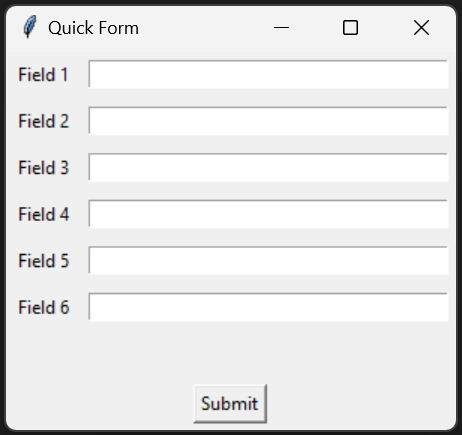
After playing around with Tkinter, I found I was impressed with how simple it was to get a basic form going. It was so simple, that it was fun. Doing the same in .NET forms would have taken a bit more time. Honestly, unless you need a lot of bells and whistles, Tkinter just works. There have been many times where I needed a simple forms application to make doing certain tasks easier. For example data collection. But sometimes we just don't have time to build tools. This is where I think Tkinter could come in. I thought, what if I made myself a template for data collection. So I did and I'm happy to share it with you.
I present to you, "Quick Form." It's very simple to edit. It doesn't validate what you input, but if you need something quick and dirty to collect some data. This will do the trick! All you need to do is edit the following script, change or add the field names and Bob's your uncle. You can even edit the call back function to do whatever you need. It will pass the data from the form to your call back function. The call back I wrote in the example below creates or appends a CSV file with the data entered in the form. After clicking submit, the call back is called, the form is cleared and the focus is returned to the first field. You can enter hundreds of entries without ever touching your mouse. Now that's what I call efficiency.
This script is free for your use. Just has always, we're not responsible for possible damages. Till next time, happy programing!
import tkinter as tk
import os, csv

class formField:
    def __init__(self, name, description):
        self.name = name
        self.description = description

class form:
    def __init__(self, title, formFields, callback):
        self.title = title
        self.formFields = formFields
        self.callback = callback

        self.window = tk.Tk()

        self.window.title("Quick Form")
        self.window.columnconfigure(1, minsize=250)

        self.fields = []

        for idx, formField in enumerate(self.formFields):
            label = tk.Label(master=self.window, text=formField.description)
            label.grid(row=idx, column=0, padx=5, pady=5, sticky="w")

            entry = tk.Entry(master=self.window)
            entry.grid(row=idx, column=1, padx=5, pady=5, sticky="we")

            self.fields.append(entry)

        self.lblMessages = tk.Label(master=self.window, text="")
        self.lblMessages.grid(row=len(self.fields), column=0, columnspan=2, padx=5, pady=5)

        self.btnSubmit = tk.Button(master=self.window, text="Submit")
        self.btnSubmit.grid(row=len(self.fields)+1, column=0, columnspan=2, padx=5, pady=5)
        self.btnSubmit.bind("", self.submit)

        self.fields[0].focus()

        # clear messages when new data is entered
        self.window.bind('', self.clearMessages)

        self.window.mainloop()

    def clearMessages(self, event):
        self.lblMessages.config(text="")

    def submit(self, event):
        self.lblMessages.config(text="")

        values = self.getFieldValues()

        message = self.callback(values)
        self.lblMessages.config(text=message)

        self.clearForm()
        self.fields[0].focus()

    # returns an dictionary of form field values, keyed by field name
    def getFieldValues(self):
        values = {}

        for idx, field in enumerate(self.fields):
            values[self.formFields[idx].name] = field.get()

        return values

    def clearForm(self):
        for idx, field in enumerate(self.fields):
            field.delete(0, len(field.get()))


def callback(values):
    filename = "output.csv"

    # does the file exist?
    exists = os.path.exists(filename)

    try:
        with open(filename, "a" if exists else "w") as csvfile:
                writer = csv.DictWriter(csvfile, fieldnames=list(values.keys()), lineterminator="\n")
                if not exists: writer.writeheader()
                writer.writerow(values)
        return "Wrote 1 Line"
    except IOError:
        return "I/O error"

formFields = []

formFields.append(formField(name="field1", description="Field 1"))
formFields.append(formField(name="field2", description="Field 2"))
formFields.append(formField(name="field3", description="Field 3"))
formFields.append(formField(name="field4", description="Field 4"))
formFields.append(formField(name="field5", description="Field 5"))
formFields.append(formField(name="field6", description="Field 6"))

form = form(title="Quick Form", formFields=formFields, callback=callback)
While working on the Matching Quiz, I realized Javascript is missing one of my favorite Python functions: Range. For those who don't use Python, Range allows you to generate a list of numbers. It doesn't sound useful on the surface, but trust me it is. Note I will be using the term list and array interchangeably throughout this article. I'm lazy like that. In Python, range is often used to generate enumeration for loops. In my case I needed to generate a list of numbers in random order. This controls the sorting for the Matching Quiz. Now Python's Range function doesn't do randomization by default, it's something extra I added for my use case. So how do you use Range? It's simple, let's walk through the parameters.
Parameters
The start parameter is the lowest number in your generated set of numbers. For example if you're wanting a list of numbers from 1 to 10, you would specify 1 for the start parameter. Next is the stop parameter. This tells the script to stop generating numbers, however it is not included in the list of numbers. For example if you wanted a list of numbers from 1 - 10, you would have to specify 11 for the stop parameter. This behavior may seem odd at first, but this is how Python implements the function. Next is the step parameter. This parameter is optional. But this allows you to control how many steps between each number in the list. For example, say you want only odd numbers from 1 - 10 in your list. You would start with 1, stop with 11 and step with 2 (range(1, 11, 2)). The end result would be [1, 3, 5, 7, 9]. Pretty neat huh? Ok Matt, what's the random parameter? "randomize_order" is an optional bonus parameter I added for my use case. I needed the numbers to be returned in a random order. It defaults to false, so if you don't pass it. You'll end up with a standard list of numbers.
        function range(start, stop, step = 1, randomize_order = false) {
            let arr = [];

            for(let i = start; i < stop; i += step) {
                arr.push(i);
            }

            if(randomize_order) arr = arr.sort(() => Math.random() - 0.5);

            return arr;
        }
Conclusion
Feel free to grab and use the code as you like. As always it's not our responsibility for damages (if they happen). Yotta yotta. But this is a great away to have the best of both worlds when switching back and forth between Python and Javascript.
Every now and then, you find yourself doing a repetitive task. After about the third or four time, you're like "I can automate this." I find myself doing this all the time. Sometimes I can find ways to automate, sometimes I'm just out of luck. But this time I was able to. So I thought I would share this script I wrote and have found useful. Let me try to explain what it does.
The Problem
I write another blog about tv and movie cars. Every so often, I do post about upcoming streaming offerings of movies and tv shows that feature cars. I like to feature the posters of the movies in the post as a panel. Or at least that's the only terminology I can think of to describe it. You can see an example of this above. If you can think of a better name or know the proper name. Let me know! For years, I would throw the posters into MS-Paint. I would find the smallest poster by height and then add them all manually. For a three or four poster panel this would take me a few minutes. I finally said, enough is enough. Let's automate this. But how?
The Solution
For the last year or so, I have been studying Python. Just so happen to stumble across a Python library called Pillow. This library is just for working with images. It can do all kinds of stuff! So after thinking through the steps I would have done in MS-Paint, I was able to recreate that process in a Python script. Feel free to checkout the result below and copy or use it for your own use. As always, no warranties and we assume no reasonability for damages.
# Name: paneler
# Description: Merges all of the images in the 'files' directory into a single inline panel image.

import os
from PIL import Image

dir = "files"

files = os.listdir(dir)

smallestHeight = None

# load images into an list
images = []

for idx, file in enumerate(files):
    images.append(Image.open(f"{dir}/{file}"))

    # track the smallest height
    if smallestHeight == None or images[idx].height < smallestHeight:
        smallestHeight = images[idx].height

newWidth = 0
newHeight = smallestHeight

# resize all other images to match smallest height
for idx, image in enumerate(images):
    if image.width != smallestHeight:
        image.thumbnail(size=(images[idx].width, smallestHeight), resample=Image.Resampling.LANCZOS)
        newWidth += images[idx].width

# build a new image
newImage = Image.new(mode="RGB", size=(newWidth, newHeight), color=(0,0,255))

left = 0

# add images to new image, increase left by current width
for idx, image in enumerate(images):
    newImage.paste(image, (left, 0))
    left += image.width

newImage.save(f"{dir}/newimage.jpg")


 Introduction