Sunday, June 15th 2025

Having trouble getting stable analog readings from a noisy component? There's several ways to resolve this. Either through additional hardware (capacitor) or through software. Recently, I had such case. Thought I would share a quick-tip on how to solved this through software. The solution is pretty easy. Just take multiple readings and average them before returning the result. Take a look at the sample code below. I hope this helps resolve your noise!
 // average 4 readings for stable reading
value = (analogRead(curPin) + analogRead(curPin) + analogRead(curPin) + analogRead(curPin)) / 4;
Categories: Arduino, Quick Tips
Tags: electronics, programming
Saturday, February 1st 2025

This week I've been playing with PICO-8. It's a really interesting game console. For my first game I built a partial clone of the Atari 2600 classic "Fishing Derby." With PICO-8's unique environment you can create simple games in a matter of hours. It reminds me so much of coding on TRS-80 or C64. The LUA scripting language is very quick to pickup and learn. Anyways, enjoy my first game below. Hopefully have more to come.
Categories: Game Development
Tags: pico-8, programming
Sunday, January 26th 2025
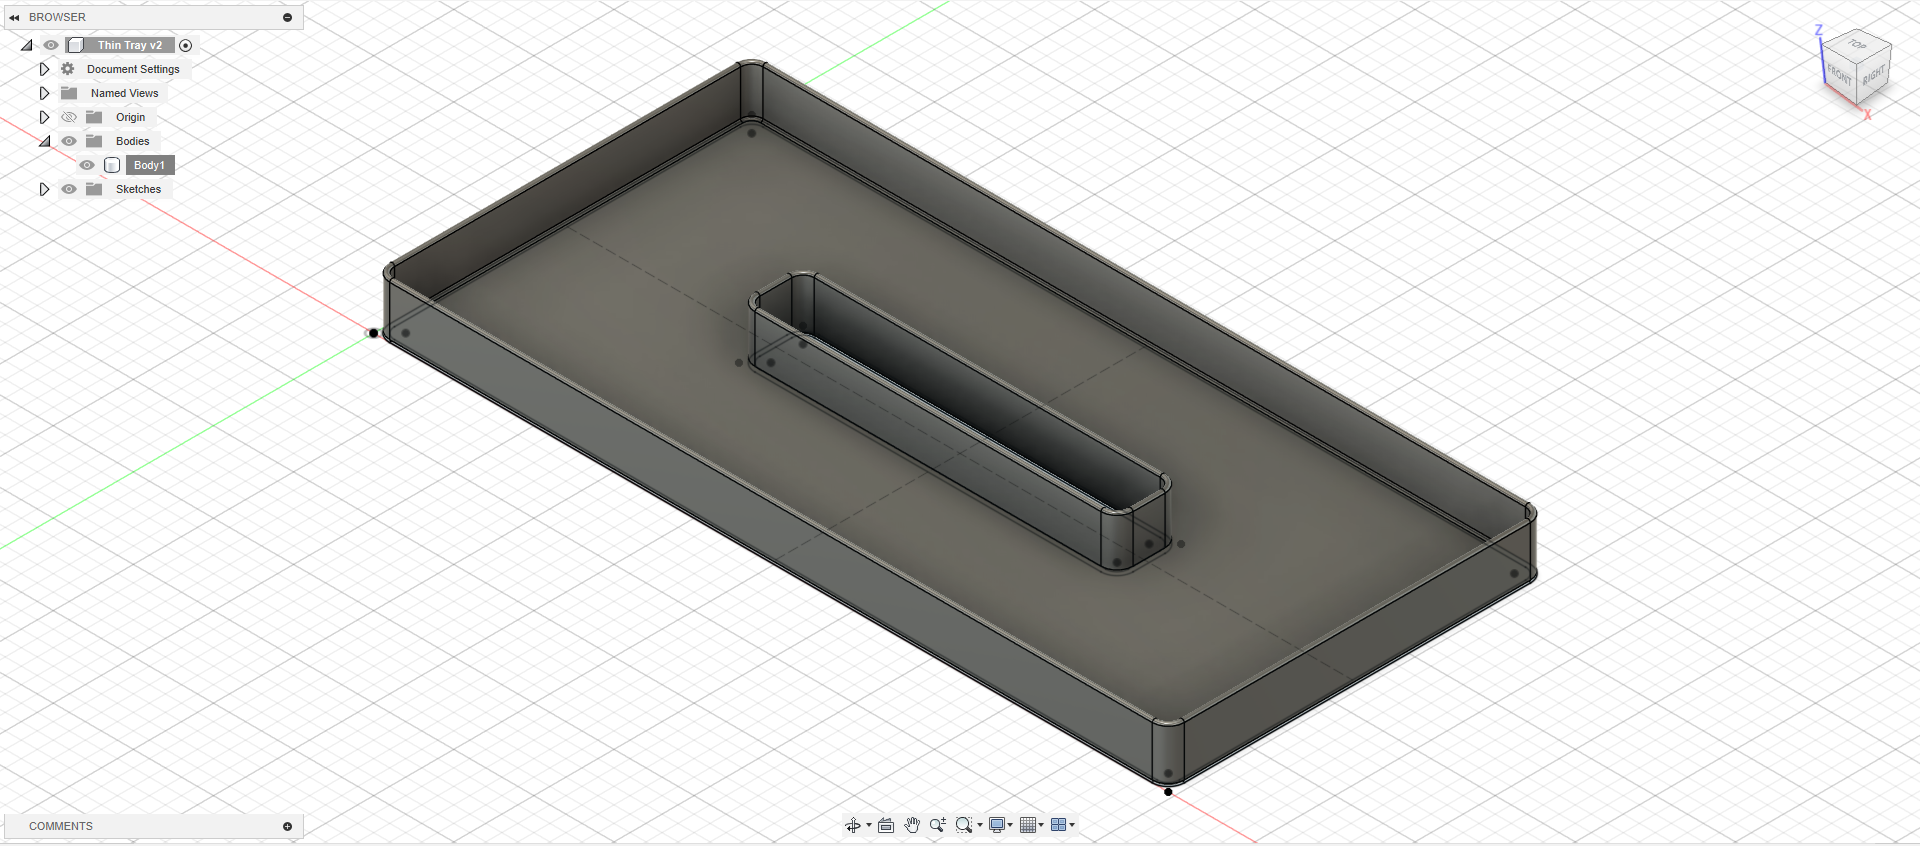
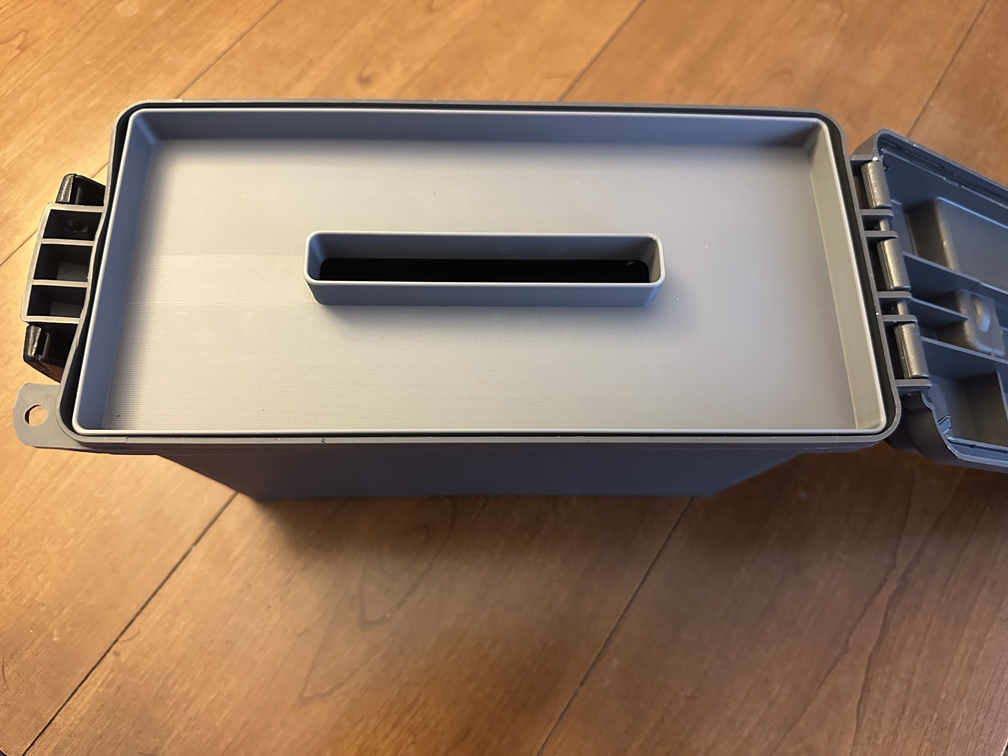
I've been working on organizing some measuring tools for use when 3D modeling. In the past I have used these plastic ammo cans sold by Harbor Freight Tools as tool boxes. They are a great solution, however is there's no way to divide the space (tools I use regularly and tools I don't use often). So I thought why not make my own tool tray to accomplish this? This model takes advantage of the built in contours at the top of the case for a press fit without any modifications to the ammo box. This is one of my first designs in Autodesk Fusion. I'm starting to get the hang of it. I've made my design available for free on Maker World. Print yours today!

Categories: 3D Modeling
Tags: fusion
Thursday, December 26th 2024
 Image Courtesy of FreePik.com
Happy Holidays everybody! Just a quick post to show off a Binary Clock I made using HTML/CSS/Javascript. This is similar to the clocks once sold by Think Geek. I always wanted one of my own, but could never justify the cost. But I figure why not try my hand at making one in software. Each LED is just a DIV element with a 100% round border with two CSS classes for each state (off/on). I wrote some code that runs every second to generate a time string. I convert the time string to binary and update the LEDs. Feel free to look at the code below the example. As always, code available at your own risk!
Clock
<!DOCTYPE html>
<html lang="en">
<head>
<meta charset="UTF-8">
<meta name="viewport" content="width=device-width, initial-scale=1.0">
<title>Binary Clock</title>
<style>
.title {
width: 100%;
font-size: 24pt;
font-family: 'Courier New', monospace;
font-weight: bold;;
}
.clock-body {
display: flex;
flex-direction: row;
width: 300px;
height: 150px;
border: solid 2px;
border-radius: 5px;
background-color: grey;
align-items: end;
text-align: center;
padding-bottom: 25px;
}
.clock-col {
width: 20%;
}
.clock-led {
border: solid 2px;
border-radius: 100%;
width: 25px;
height: 25px;
background-color: green;
margin: auto;
margin-top: 2px;
line-height: 1.5;
}
.clock-led-on {
background-color:chartreuse;
}
</style>
</head>
<body>
<div class="title">Binary Clock</div>
<div class="clock-body">
<!-- HOURS -->
<div class="clock-col">
<div class="clock-led"></div>
<div class="clock-led"></div>
</div>
<div class="clock-col">
<div class="clock-led"></div>
<div class="clock-led"></div>
<div class="clock-led"></div>
<div class="clock-led"></div>
</div>
<!-- MINUTES -->
<div class="clock-col">
<div class="clock-led"></div>
<div class="clock-led"></div>
<div class="clock-led"></div>
</div>
<div class="clock-col">
<div class="clock-led"></div>
<div class="clock-led"></div>
<div class="clock-led"></div>
<div class="clock-led"></div>
</div>
<!-- SECONDS -->
<div class="clock-col">
<div class="clock-led"></div>
<div class="clock-led"></div>
<div class="clock-led"></div>
</div>
<div class="clock-col">
<div class="clock-led"></div>
<div class="clock-led"></div>
<div class="clock-led"></div>
<div class="clock-led"></div>
</div>
</div>
</body>
</html>
<script type="text/javascript">
// first digit of the hour only needs 1,2, second digit 1,2,4,8, ex..
const digitLengths = [2, 4, 3, 4, 3, 4];
window.setInterval(() => {
// get current time from time string ex. 23:59:59 => 235959
const strTime = new Date().toTimeString().substring(0,8).replace(new RegExp(":","g"),"");
// loop over each time digit
strTime.split("").forEach((c,ci) => {
// convert strTime to binary for the digit length
const binary = Number(c).toString(2).padStart(digitLengths[ci],"0");
// loop over binary digits
binary.split("").forEach((l,li) => {
// find the column and the led by indexs
const led = document.querySelector(`.clock-col:nth-child(${ci + 1}) .clock-led:nth-child(${li + 1})`);
// toggle the LED off
led.classList.remove("clock-led-on");
// add class on if set
if(l == 1) led.classList.add("clock-led-on");
});
});
},1000);
</script>
Categories: Programming
Tags: javascript
Sunday, August 11th 2024
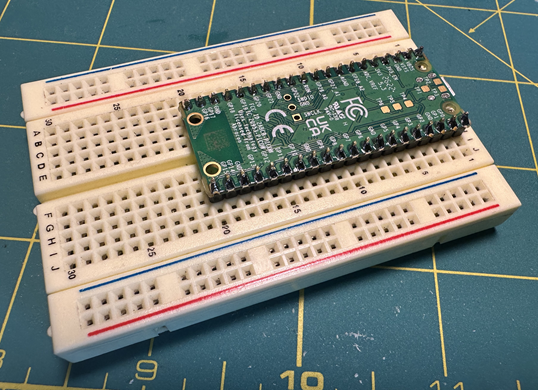
Sometimes you just have to try something new. A while back I was working on a project using the Raspberry Pi Pico. I noticed that the Pico has a nice silk screen pinout listing on the back. When installing headers normally (boot button up), this gets covered up. Why not flip the Pico over and make it easy to read? So I did just that. Above you can see my example. The only disadvantage is that the boot button is now on the underside. But generally this button should not be needed that often. Hope this may have inspired you in your projects. Enjoy!
Categories: Electronics