Sorry I've been missing in action lately. The holidays and other things have kept me busy. But that doesn't mean I haven't been programing. I've actually been doing a lot of web/javascript development lately on personal projects. One of those projects has been building my own version of a web based solitaire with drag and drop support. While dealing with that, I learned a few things along the way. Today I thought I'd share what I learned in this process.
What's a polyfil?
A polyfil is a piece of code that extends the capabilities of a browser. Say for example, an older version of a browser doesn't support a niffy new HTML5 thing. You could write a "polyfil" and provide support for the missing feature. In my case I'm building a web application that depends on drag and drop. Well not all browsers, especially mobile browsers don't support this feature. The case that surprised me the most, was a fairly recent version of Chrome for Android. Seems odd in 2024, but that's the state of things. So what do you do?
The Solution
Well in my case after a lot of Googling, I found a library/polyfil to do the job. So introducing dragdroptouch by Bernardo-Castilho. This library adds support for a lot of older browsers as well as mobile browsers that nativity don't support drag and drop. For example some recent versions of Chrome on Android do not support this common feature. All I had to do was just include Bendardo's polyfil and off to the races. Problem solved. I can now drag and drop cards and all is right with the world.
I hope this helps someone else who was struggling to find this solution. That's a big part of why I share this on my blog. Hopefully, I'll have my project complete soon and ya'll can enjoy that. Till next time, happy programming.
Got another quick tip for ya! Have you ever needed to run the same batch operation on a several files without running it multiple times? I found myself in that situation this week actually. I thought I would share my solution to a common problem. It's easier than you think. You can actually drag and drop a selection of files onto a batch file. Without some code changes this won't run the batch file for each selected file on it's own. But it will pass each selected file name to the batch file as an arguments. Let me illustrate this neat feature.
Say you have a batch file named run.bat. and three data files named: file1.dat file2.dat, and file3.dat. When you click run.bat without dragging, Windows runs the command "run.bat". When you select and drag those three files over run.bat, Windows will pass the file names off as arguments to run.bat. The command ends up being "run.bat file1.dat file2.dat file3.dat". Pretty neat huh? It's a lot faster than typing all that out in shell. But how can we reference those file names in our batch file? Well we can loop or iterate over those arguments and perform the same task on each file.
In the example below, I needed to change the extension on a bunch of files. Sure I could manually rename them or use a wildcard, but what would be the fun in that? So I wrote this batch file to rename each file that gets passed to it as an argument. Now note, when I researched this. I found several different ways to iterate over batch arguments. This one made the most sense to me. If you would like to see some of the others, check out this great Stack Overflow Question for reference. Also feel free to use my example at your own risk. We're not responsible for damages. Till next time, happy batch'n.
:loop
set "file=%1"
move %1 %file:~0,-3%txt
shift
if not "%~1"=="" goto loop
pause
I've been playing around with Tkinter this week. What is Tkinter? Tkinter allows you to build GUI based applications in Python. It's not the only GUI library for Python, but it is included when you install Python. So pretty much any install of Python is going to include Tkinter. I just repeated myself didn't I? Oh well. So why build GUI based applications. Well for ease of use. Most end-users today, would laugh if you gave them a console application. Despite the fact console applications can often be more efficient than GUI based ones. But at the end of the day, GUI applications just look and feel better.
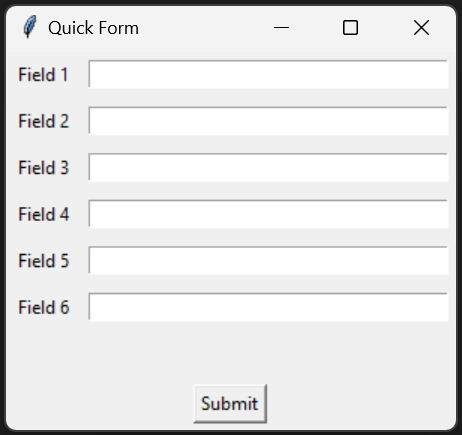
After playing around with Tkinter, I found I was impressed with how simple it was to get a basic form going. It was so simple, that it was fun. Doing the same in .NET forms would have taken a bit more time. Honestly, unless you need a lot of bells and whistles, Tkinter just works. There have been many times where I needed a simple forms application to make doing certain tasks easier. For example data collection. But sometimes we just don't have time to build tools. This is where I think Tkinter could come in. I thought, what if I made myself a template for data collection. So I did and I'm happy to share it with you.
I present to you, "Quick Form." It's very simple to edit. It doesn't validate what you input, but if you need something quick and dirty to collect some data. This will do the trick! All you need to do is edit the following script, change or add the field names and Bob's your uncle. You can even edit the call back function to do whatever you need. It will pass the data from the form to your call back function. The call back I wrote in the example below creates or appends a CSV file with the data entered in the form. After clicking submit, the call back is called, the form is cleared and the focus is returned to the first field. You can enter hundreds of entries without ever touching your mouse. Now that's what I call efficiency.
This script is free for your use. Just has always, we're not responsible for possible damages. Till next time, happy programing!
import tkinter as tk
import os, csv

class formField:
    def __init__(self, name, description):
        self.name = name
        self.description = description

class form:
    def __init__(self, title, formFields, callback):
        self.title = title
        self.formFields = formFields
        self.callback = callback

        self.window = tk.Tk()

        self.window.title("Quick Form")
        self.window.columnconfigure(1, minsize=250)

        self.fields = []

        for idx, formField in enumerate(self.formFields):
            label = tk.Label(master=self.window, text=formField.description)
            label.grid(row=idx, column=0, padx=5, pady=5, sticky="w")

            entry = tk.Entry(master=self.window)
            entry.grid(row=idx, column=1, padx=5, pady=5, sticky="we")

            self.fields.append(entry)

        self.lblMessages = tk.Label(master=self.window, text="")
        self.lblMessages.grid(row=len(self.fields), column=0, columnspan=2, padx=5, pady=5)

        self.btnSubmit = tk.Button(master=self.window, text="Submit")
        self.btnSubmit.grid(row=len(self.fields)+1, column=0, columnspan=2, padx=5, pady=5)
        self.btnSubmit.bind("", self.submit)

        self.fields[0].focus()

        # clear messages when new data is entered
        self.window.bind('', self.clearMessages)

        self.window.mainloop()

    def clearMessages(self, event):
        self.lblMessages.config(text="")

    def submit(self, event):
        self.lblMessages.config(text="")

        values = self.getFieldValues()

        message = self.callback(values)
        self.lblMessages.config(text=message)

        self.clearForm()
        self.fields[0].focus()

    # returns an dictionary of form field values, keyed by field name
    def getFieldValues(self):
        values = {}

        for idx, field in enumerate(self.fields):
            values[self.formFields[idx].name] = field.get()

        return values

    def clearForm(self):
        for idx, field in enumerate(self.fields):
            field.delete(0, len(field.get()))


def callback(values):
    filename = "output.csv"

    # does the file exist?
    exists = os.path.exists(filename)

    try:
        with open(filename, "a" if exists else "w") as csvfile:
                writer = csv.DictWriter(csvfile, fieldnames=list(values.keys()), lineterminator="\n")
                if not exists: writer.writeheader()
                writer.writerow(values)
        return "Wrote 1 Line"
    except IOError:
        return "I/O error"

formFields = []

formFields.append(formField(name="field1", description="Field 1"))
formFields.append(formField(name="field2", description="Field 2"))
formFields.append(formField(name="field3", description="Field 3"))
formFields.append(formField(name="field4", description="Field 4"))
formFields.append(formField(name="field5", description="Field 5"))
formFields.append(formField(name="field6", description="Field 6"))

form = form(title="Quick Form", formFields=formFields, callback=callback)
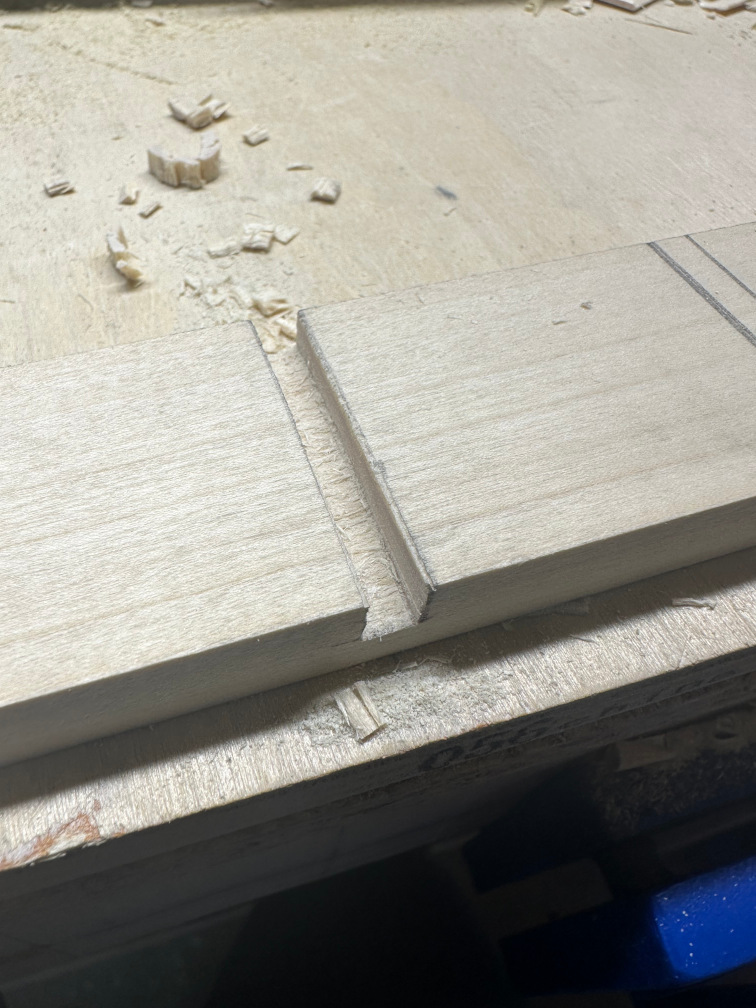
I haven't featured woodworking before on this blog. But I do enjoy doing some from time to time. I try to learn new techniques whenever possible. Sometimes taking on projects just so I can learn something new. Right now I'm working on building a display shelf for items found in a advent calendar. So I thought I would make a simple grid shelf design. The goal is to try and make everything by hand using only hand tools. Also to limit the use of mechanical fasteners. In order to do this, I needed to learn how to cut dados.
What are dados? A dado is a type of joint. You may have seen them before on bookcases to hold the shelves. It's this little groove that allows another piece of wood to fit into. They're not too hard to make. But making small dados can be challenging. I ended up finding a great video to help make this process easier. You can check it out below. The biggest advise I can give is take your time. Being in a hurry just makes mistakes happen faster. Below are the steps that work for me. These notes may be more useful for myself, but I thought I'd share them and the video I found helpful.
Steps
Mark cut lines with a pencil.
Using a knife, score the lines.
Go back over the lines with a chisel.
Chisel and bezel a saw guide on the top lines (inside out).
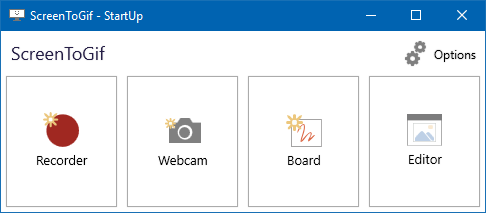
From time to time you find tools that make your life easier. But often we don't share or give credit to those tools. Today, I thought I would share a tool I've been using over the last year or so. This tool allows you to record your screen and produce GIFs. I've found a number of great uses for this tool. My first encounter was while doing troubleshooting for a software bug. While working as a manager of a software development team a support technician reported an issue with our software. Our developers could not reproduce the problem. The classic "it works on my machine" type scenario. Unfortunately we didn't have time setup a meeting for the technical support staff to demonstrate the bug. I got thinking, a picture is a thousand words. But a video much more. So I went looking for a simple way for them to record their screen. That's when I came across Screen To GIF.
Screen To GIF is a Windows application that can be installed or ran as a portable app. It's very simple to use. Just launch the software and you're presented with a simple record button. Click record and another window will open that behaves similar to a view finder on a camera. Whatever's in the window will be captured in the final GIF. Once you're done recording you're presented with a video editor. You can crop and edit to your hearts content. Then export the video as a GIF.
In my use case it worked perfectly. They were able to capture the bug. I shared it with the team and we solved the problem. Even as well as they described the behavior, they left out important details. Having a video captured the missing details. One thing to note is that GIFs can get rather large the longer they go. If what you're capturing is longer than 30 seconds, I would suggest using a video capturing application. But we'll save that for another post. Till then happy clip'n.